

I have always wanted to know how to make those perfect little bows and flowers that can be used for just about anything: hair clips, headbands, pins, scrapbooking, embellishing, the list goes on and on. So after some trial and error experimenting and looking at several different tutorials (ok, and making about a dozen or so of each for our little girl due this summer ;), I think I have it down to a science.
 |
| I loved picking out felt that I knew would match some of my favorite outfits of hers! *Scroll all the way down to see how to make a multi-colored pom pom |
 |
| Too cute! |
I will start with the supplies you will need:
-Felt sheets (I bought mine at Michael's, $.29 each for a 9"x12")
-Hot glue gun (make sure you have extra glue on hand, I went through quite a bit) or fabric glue
-Scissors
And that's it. Seriously, I love how easy these are!
Let's start with the Pom Poms:
I wanted this flower to be on the larger side so I cut a strip of felt about 2" wide and 12" long.

Next you will fold the felt in half and glue the edges together with a pretty thin line of glue (using too much glue will make the next step more difficult).

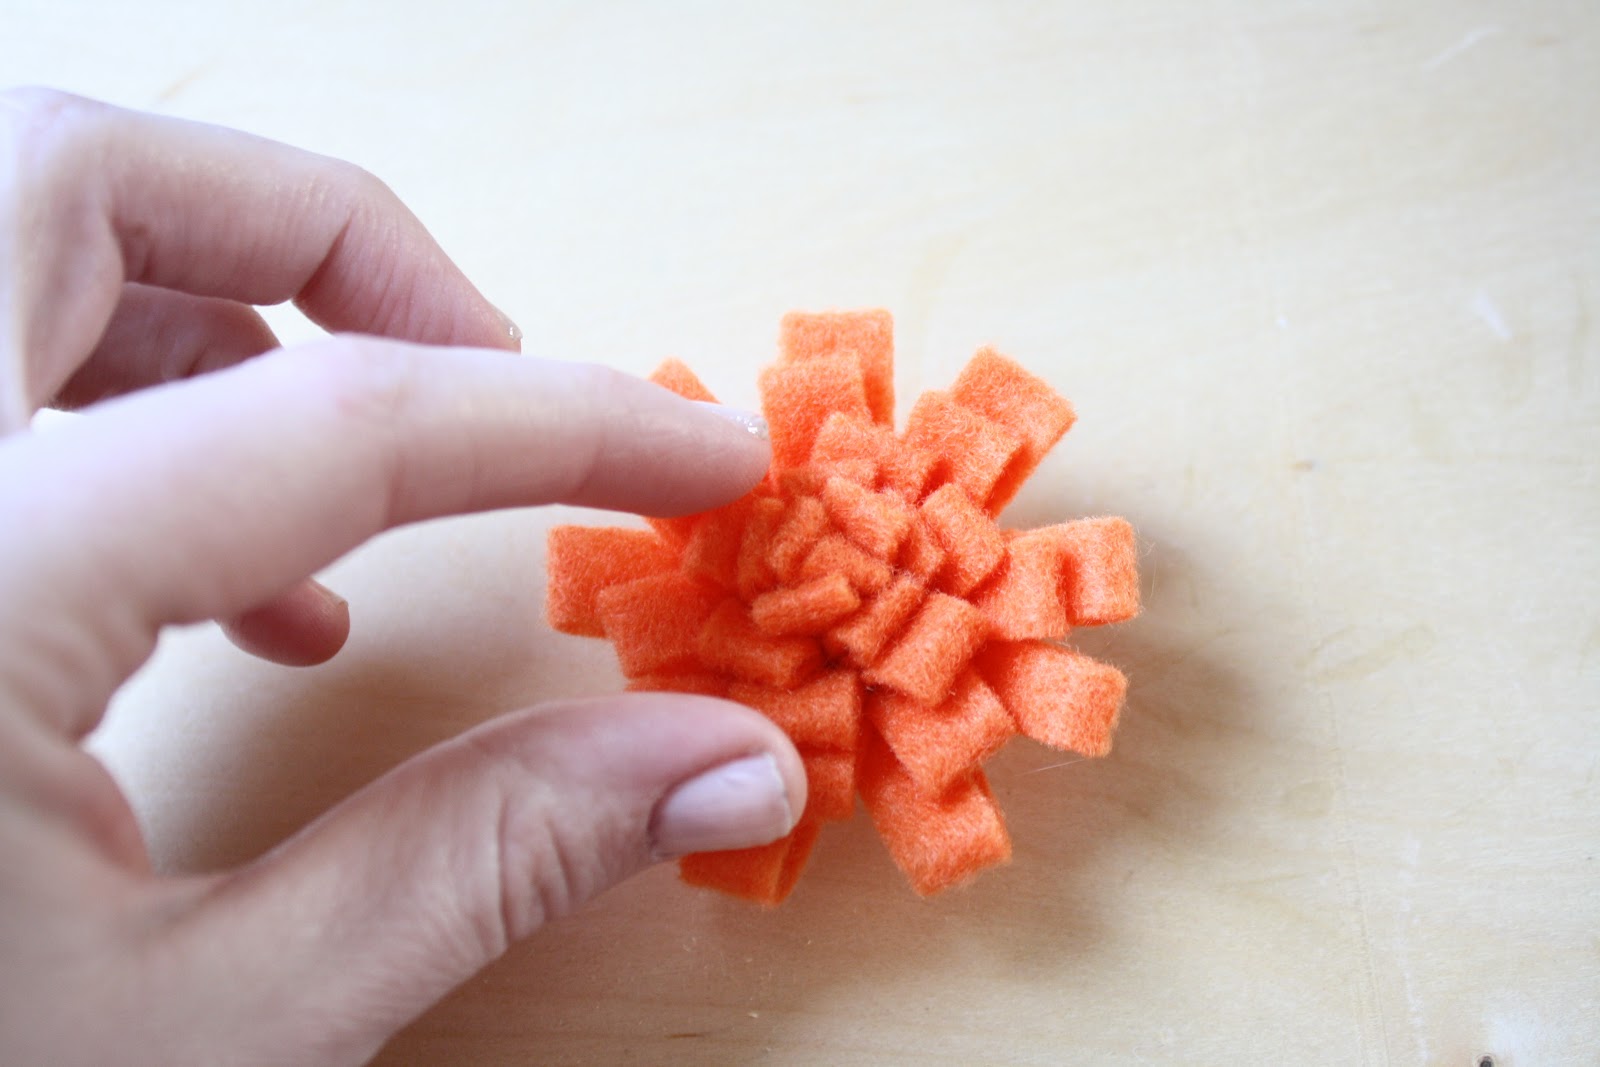
Now begin cutting slits on the folded side of your strip of felt. You can change the look of your flower by making the slits larger or smaller.

Once you are done cutting, apply a strip of glue and begin to roll the felt.

Continue until the end where you should add a bit of glue on the last "petal" to keep it from unrolling later.


Turn it over and give it a little fluff by spreading out the petals.
The leaves are pretty self explanatory. I cut mine out separately then glued them together.


I then put a good amount of glue on the leaves themselves and set the flower on top of the leaves, eyeballing where I want them to be.


And voila! Your very own Pom Pom. Fun right? I pretty much guarantee you will have about a million of these by the end of the day. You're welcome ;)

Ok, moving on to bows:
I didn't want this bow to be too large so I cut a strip of felt that ended up being about 3/4" wide and 5" long.

The first thing you will do is bring the edges into the middle and glue one side on top of the other (just a little dab of glue here. Using too much will make the following steps harder).

After that you will want to cut a small strip of felt that is about 1/3 the width of the first strip and approximately 1.5" long.

Grab the larger piece again and squeeze the middle of the felt together, creating the crease in the center.

This is where it might get tricky ;) Once you have a good grip on the crease, wrap the smaller strip of felt around and bring edges to the back of the bow.

Put a dab of glue under one end of the strip and keep pinching the fold until dry. Trim the access felt if need be.

Lookin' good, right? ;)

Now you will want to cut a third strip that is just a tad longer on each end and about 1/2 the width of the bow.

Cut the edges without making the strip any shorter.

Glue your bow to the final strip.


And there you have it. A perfect little bow.

*To make a pom pom like the orange and pink one shown above, simply cut two separate pieces of felt (1" each instead of 2" as shown, no folding) and glue together.
you are gonna be the CUTEST MOMMY! and Sophie is going to be the cutest baby! Can't wait to see pics of her wearing her little hair bows and flowers! LOVE YOU!
ReplyDeleteFUN! :)
ReplyDelete